Tracking Pixel
Graham Thompson / February 2022
Quick and Dirty Personal Web Analytics with Tracking Pixels
While working on this blog I decided I need some basic web analytics. I don’t want anything fancy but I do want a view count and I want to see how much traffic I’m getting on various services all in one place. Like most people these days a lot of my public presence I’d like to track is hosted on various external hosts (ex: github).
tldr: you can grab my full script for quick and dirty web analytics here
Why not Just Use x
The usual industrial strength solution for web analytics is google analytics or their various competitors. There’s a few things that make them innapropriate for my use case:
- javascript: google analytics embeds are javascript which can’t be used when js is disabled which is often the case for content hosted on external services like github profiles.
- complexity: way more features than I want and I don’t want to spend all day on it
- privacy concerns: google has too much data, let’s cut their engineers a break.
Tracking Pixels
There’s an old school technique called tracking pixels where access to a site or resource can be tracked by embedding an invisible image from an external host you control. The “pixel” is generally 1x1 transparent image like the following.
Very Simple Setup for Analytics with Tracking Pixels
There’s a number of examples of using tracking pixels with a full web service of some sort. This is more work than I want to put in though. We can acheive the same results with a simple static web server, a script and a cron job. I used the following setup.
- server: nginx server on a cheap hosting provider to serve tracking pixels
- script: python script to parse the nginx access logs and detect any new accesses to my tracking pixels
- cron job: set the script to run every few minutes and update a simple view count
Server Setup
Set up a new nginx instance if you don’t already have one. Then add a server block to your nginx configuration to handle the tracking pixels like the following. The root route serves the view count and the images route will serve the actual tracking pixels.
server {
    access_log /var/log/nginx/tracking.access.log;

    location / {
	root /var/www/tp;
  }

}
Place one or more tracking pixels in the /img subdirectory and give them unique names. Place an image tag which references your tracking pixels onto the sites or services you want to track.
Script
Full code linked above. This is a fairly simple script which checks for accesses newer than the previous check which match the url pattern for our tracking pixels. eg: “/images/test.png”. Create a directory “access-parse” in /usr/local/bin/ and place the script in it.
CronJob
crontab -e
open up your cronjobs and add the following line.
*/5 * * * * /usr/bin/python3 /usr/local/bin/access-parse/tracking.py >> /usr/local/bin/access-parse/log.cron
This will run our tracking script every 5 minutes. Any error messages will be dumped to the log file.
Embed Tracking Pixels
Now just place a link like the following in your site, github profile, etc.
<img src="yoursite.com/img/page1.png">
Enjoy
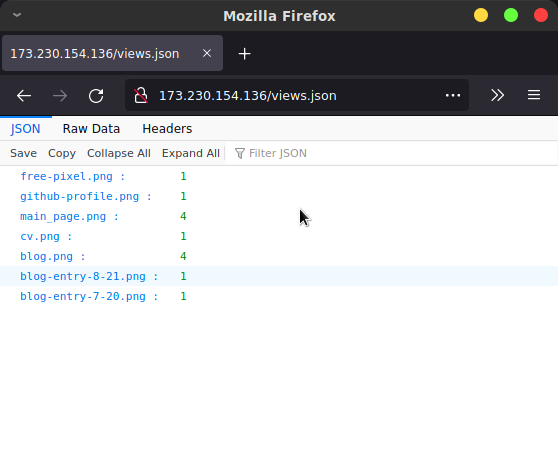
And that’s all the setup that’s required. Go to ‘yourserver.com/views.json` and enjoy your new high tech web analytics solution.

Github Profiles and Proxying
Some services like github or gmail will allow you to embed image links but will proxy the image request. For example when I load the tracking pixel embedded in my github profile my server gets a request like the following.
{'ipaddress': '140.82.115.117', 'dateandtime': '24/Feb/2022:22:42:18 +0000', 'url': '/img/github-profile.png ', 'statuscode': '404', 'bytessent': '169', 'refferer': '-', 'useragent': 'github-camo (xxxxx)'}
Github camo is githubs image proxying service and is shielding the ip and other personal information of the user by replacing our link with their own and scraping the intended asset from our site. This stops us from getting information about the direct request but we can still get a view count by setting non-caching headers or returning a 404 (easy way is just link to a non-existent asset) which forces the proxy to attempt to redownload the asset from our server every time someone hits the replaced link.
